Product details
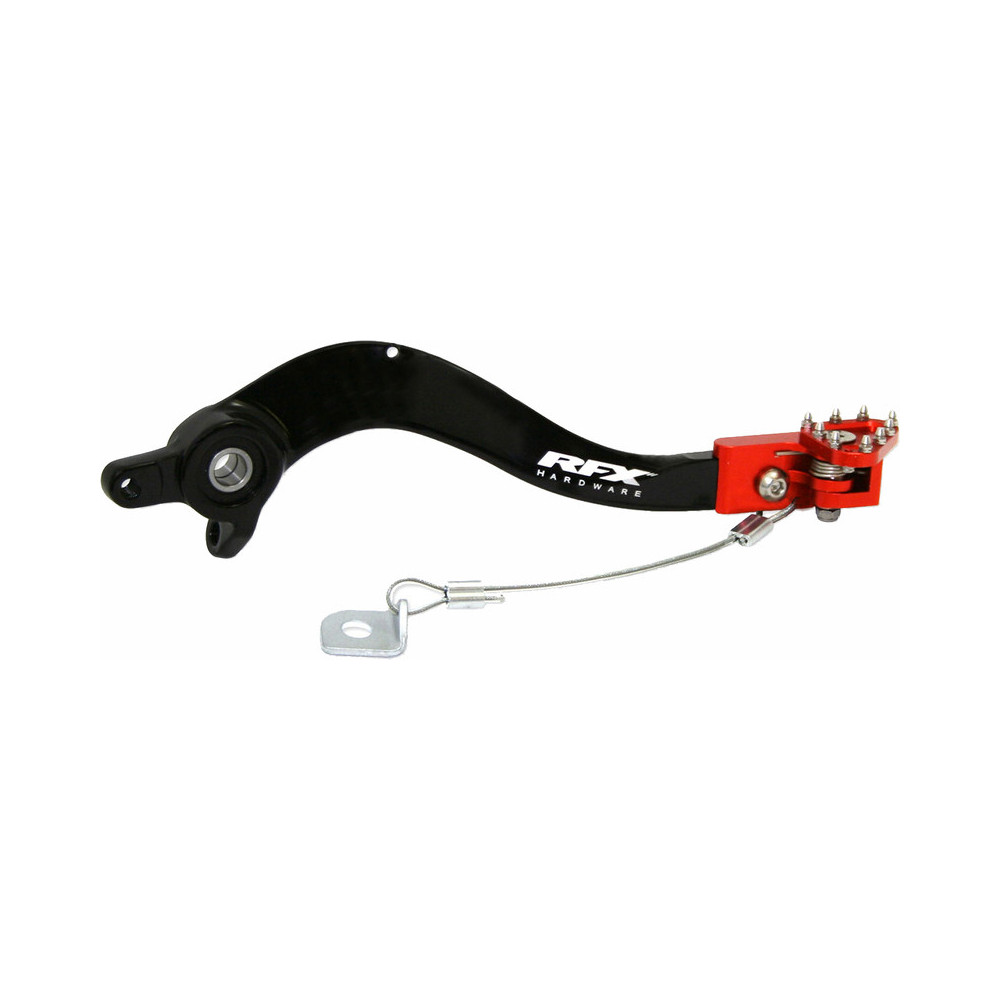
RFX Pro Series brake pedals are designed and tested for use at the highest level.
The Pro Series brake pedals are made from 7075-T6 aluminum and feature a forged OEM-style axle. The smooth finish of the axle reduces wear associated with a knurled design.
Les embouts flexibles de la série Pro sont en billettes d'aluminium usiné CNC et comportent un embout rotatif à ressort qui, en cas d'impact, comme dans une ornière, tourne pour réduire les dommages. L'embout est également doté de dents pointues pour faciliter l'adhérence dans les conditions boueuses.
Les embouts flexibles de la série Pro intègrent également une butée sur l'embout pivotant, qui arrête l'embout à 90 degrés de rotation, évitant ainsi les dommages qui peuvent se produire si l'embout tourne sous le couvercle d'embrayage.
Les pédales de frein série Pro intègrent également un serpent de frein à câble, ce qui permet d'éviter que l'axe de la pédale ne soit tordu en cas de collision.
Features:
- Nouvel embout solide en billettes 7075-T6, avec design d'écoulement.
- Nouveau réglage à 2 positions sur l'embout.
- Nouvelle version en option de l'embout anodisé dur disponible pour les modèles actuels.
- Nouveau style de serpent de frein avec pince réglable.
- Nouvel arbre noir anodisé dur pour éviter la corrosion et réduire l'usure.
- Fourni complet avec roulements et bagues pour certains modèles.
- Laser-engraved logo.
Assembly instructions:
- Commencez par noter la hauteur de l'extrémité de la pédale par rapport au repose-pied.
- Remove the R-clip or split pin from the rear of the brake bolt located behind the frame.
- Remove the pivot bolt that secures the pedal to the frame.
- Detach the pedal return spring and let it hang down.
- Turn the pedal outward to expose the split pin at the rear of the pedal cap.
- Remove this split pin and the positioning pin, and the rear brake pedal will now come off.
- Remove the oil seals from the old pedal, clean them, and reinstall them on the new pedal.
- Clean all parts with a multi-purpose lubricant such as Maxima MPPL, ready for reinstallation.
- Replace the brake cap, the retaining pin, and the split pin.
- Replace the return spring.
- Apply Maxima waterproof grease to the pivot bolt, align the pivot hole, and replace the bolt.
- Tighten the pivot bolt to the torque specified in the user manual.
- Replace the clip/split pin at the rear of the pivot bolt.
- Once the pedal is secured, adjust the pedal height to achieve the correct position and clearance by loosening the nut above the clevis and turning the plunger bolt inward or outward as needed.
- Now install the brake hose.
- Japanese models - Remove the nut and washer from the lower motor mount, replace the old washer with the new washer that is attached to the brake hose.
- KTM models - Remove the new washer attached to the brake hose, set it aside as it is not needed on KTM models, loop the cable around the lower engine mount and replace it inside the crimp fitting.
- Set the correct tension on the brake cable, remembering to allow for downward extension of the pedal.
- Crimp the connector using pliers and cut off any excess cable.
 SUPERMOTARD KITS